PDF mark-up using Adobe Reader DC is one of the most common methods of proofreading onscreen – all my publisher clients and many of my non-publisher clients use it as part of their publishing workflow. If you’re not quite sure what that workflow looks like, have a listen to this episode of The Editing Podcast, where Louise and I discuss page proofs and the proofreading process.
However, instead of taking the time to really explore the tools available to us, we tend to pick up hints and tips piecemeal, either as we learn from different jobs, through word of mouth, or shared in an online group as an answer to a specific question. Like many others, this is how I’ve gradually built up my understanding.
Here are five of my top tips that I’ve learned over the years from colleagues and from exploring the Adobe Reader DC interface. Read to the end to find out how you can learn even more about using this essential software efficiently and effectively.
1 Rotate View
Avoid a sore neck when checking landscape pages or upside-down answer keys! Use ‘Rotate View’ to turn the page in 90° increments, both clockwise and anti-clockwise.
You’ll find this option on the top left of the menu under View.
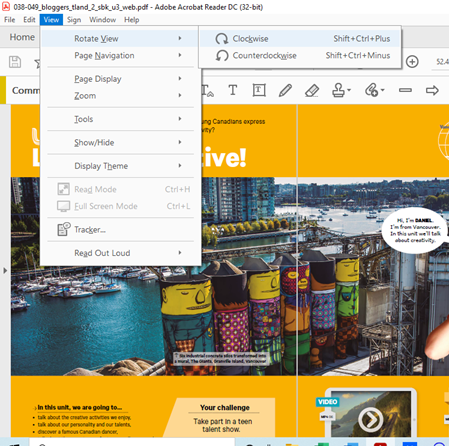
You can see that the menu also give you the keyboard shortcuts for this function:
CTRL + SHIFT + PLUS to rotate clockwise
CTRL + SHIFT + MINUS to rotate anti-clockwise
2 Show Cover View in Two Page View
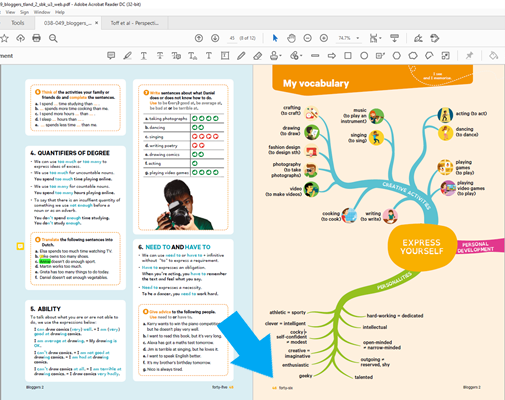
Have you ever tried to view a double page spread but the pages are not aligned correctly? Look at this screenshot from a textbook. I want to see the ‘My vocabulary’ double page spread, but you can see that the recto and verso are not aligning correctly. The even numbered pages should be on the left (verso), but here you can see it’s on the right (recto), so we’re unable to see the recto and verso pages of the spread together.
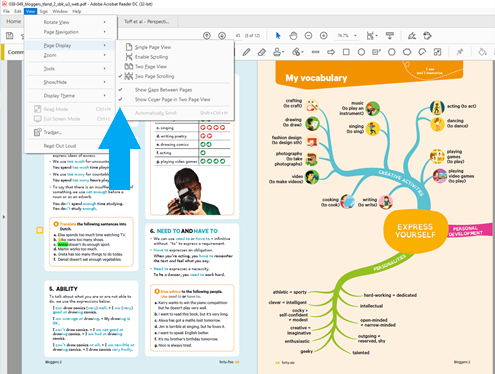
In the image below, I’ve gone to ‘View’ > ‘Page Display’, where you can see that ‘Show Cover Page in Two Page View’ has been ticked. This treats the first page of the file as the cover and displays it separately. This is great if your file has a cover, because all the following double page spreads will be correctly aligned in Two Page View.
However, in this case that setting doesn’t help us, because the file is a single unit from a textbook and so doesn’t have a cover page. This means the verso page of the first double page spread has been treated as the cover page, which has therefore thrown all the double page spreads out of alignment.
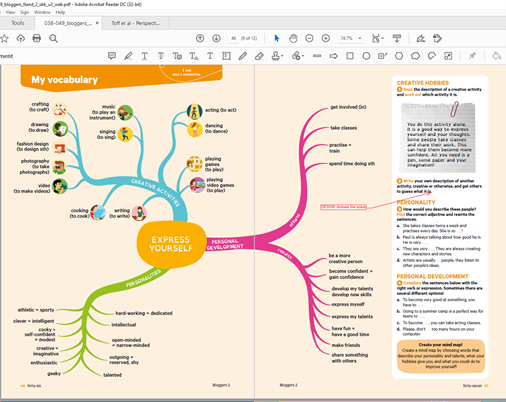
When I untick ‘Show Cover Page in Two Page View’ the double page spreads align correctly, as you can see below.
Do you want to learn more about the tools in Adobe Reader DC and best practice for PDF Mark up? My course will give you the knowledge and confidence to communicate changes clearly and efficiently.
3 Attach a Word file for large amounts of corrected text
If you need to mark up a large number of corrections in a paragraph, or replace a section of text, you might find it easier to type out the new text in a Word document and pin the document to the page, especially if you want to ensure formatting is presented clearly.
In this example, I’ve been given revised text to replace the ‘Canadian Graffiti’ article. Instead of using the ‘Add note to replace text’ tool, where I’d have to paste the entire text into a comment box, with limited options for formatting, I can use the ‘Attach file’ tool.
Click on ‘Attach file’ and then click where you would like the pin to sit in the file. This opens a browser for you to locate your Word document, which you can then pin next to the text to be replaced.
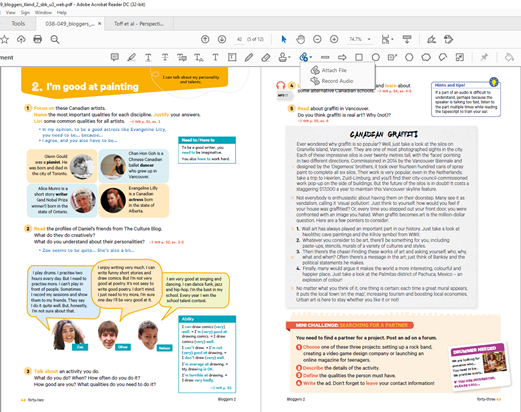
The appearance of the paperclip icon can be changed to a pin, a graph icon or a tag icon, and you can customise the colour.
The pin tool is also useful for leaving global instructions or general comments for your client/typesetter at the beginning of the file.
4 Avoid ‘floating’ sticky notes
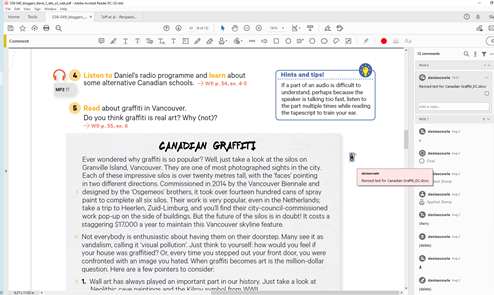
Using a sticky note is an easy way of adding general comments to your PDF mark-up, but it’s not a precise method for accurate mark up of changes to text. These notes can move on the page when the file is opened and closed, meaning that your comment about making a change to a word or phrase is now sitting next to a completely different one.
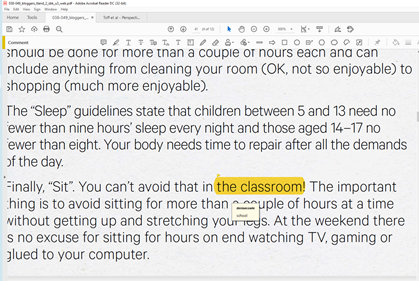
A better alternative is to use the highlighting tool on the target text and open the pop-up note attached to it.
The note stays attached to the highlighted text – you can see a small text bubble on the top left of the highlight below – and hovering the cursor over the highlight opens a small box showing the author name and content of the note.
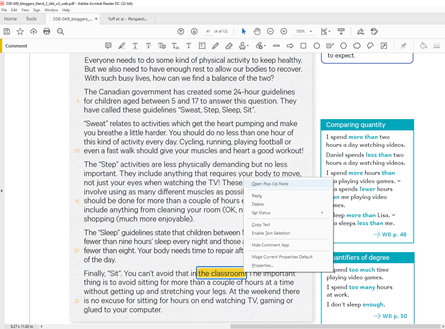
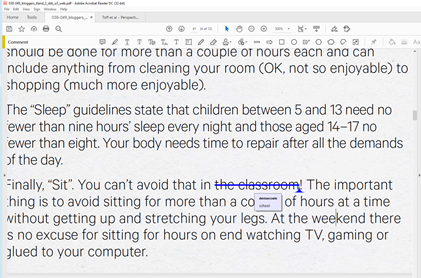
For even more precision, use the ‘Add note to replace text’ tool. You can see in this example that the exclamation mark after ‘classroom’ is excluded from the correction, whereas in the previous image the highlight drifts over it, meaning the exclamation mark could be included in the correction, which in this case would cause it to be deleted.
5 Finding errors that you know you’ve already corrected
Have you ever panicked when checking a page because you’ve spotted an error that you were sure you’d already marked up?
There are two things to check in this situation:
- is there an active filter in the comments pane?
- have you used the search function in the comments pane?
An active filter in the comments pane
If you have filtered the comments, whether by author, type or colour, all of the corrections that are not included in the filter results are hidden in the comments pane and on the page.
When a filter is active and you spot something that you think you’ve missed, remove the filter to see if your correction appears. If you make a new correction without checking this first, you may end up with two identical corrections when the filter is removed, which your typesetter won’t thank you for!
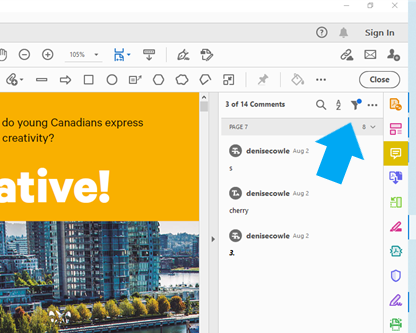
If there is an active filter, the funnel icon at the top of the comments pane has a blue dot next to it. You can see in the image below that there is a blue dot visible as I have filtered to see only ‘insert text’ comments, which hides all other types of comment from the comments pane and the page.
You can also see at the top of the comments pane ‘3 of 14 comments’, which is another sign that filtering is on.
An active search in the comments pane
The same thing happens when you search your comments for a particular word or phrase. Adobe Reader DC doesn’t just hide all the comments not included in your search results in the comments pane, it hides them on the page too. The only mark-up that you will see in your document are those that meet your search criteria.
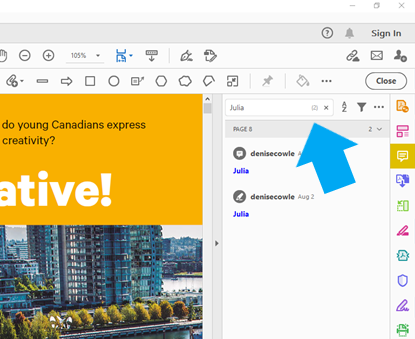
You can check if you’ve forgotten about an active search by looking at the search box. If it’s still populated with your search term and the number of instances found is showing, it’s still active and the rest of your mark-up will be hidden.
In the image below, the search term ‘Julia’ has been found twice in the comments and all other comments are hidden here and on the page.
Bonus tip
Proofreading PDFs involves marking up the corrections to be implemented by the typesetter on the source document. You do not edit the text directly, so the free Adobe Reader DC is enough to carry out this work.
New proofreaders often worry that they need to spend money on the Adobe Reader Pro version of the software. This is not necessary for marking up corrections for the typesetter to make. Save your money for core skills training, reference books, or membership of a professional editing organisation!
Is there more to learn about PDF mark-up?
If PDF mark-up is part of your work, there are many tools and functions to explore.
To help you understand the tools available for PDF mark-up in Adobe Reader DC, with tips and techniques for efficient and effective practice, I have created How to Mark Up PDF Page Proofs, a self-paced video course that delivers over 140 minutes of instruction across eight modules.

If you’d like to find out more about what the course covers, click on the button below.